Earthen Floors: A Sustainable and Unique Flooring Solution for Modern Homes
Earthen Floors: A Sustainable and Unique Flooring Solution for Modern Homes
Jan 17, 2024
When it comes to choosing flooring for your home, the options can feel endless. But have you ever considered the beauty and practicality of earthen floors? This age-old solution is making a comeback, offering a sustainable, healthy, and cost-effective alternative to other types of flooring.
Key Takeaways
- Earthen floors are a sustainable, non-toxic, and cost-effective flooring option.
- Materials needed include local clay, sand, and natural fibers like straw.
- Preparation of the subfloor is crucial for a successful earthen floor installation.
- Regular maintenance can ensure the longevity and beauty of your floor.
- Earthen floors are versatile and can be customized with pigments and designs.
Discover the Charm and Durability of Earthen Floors
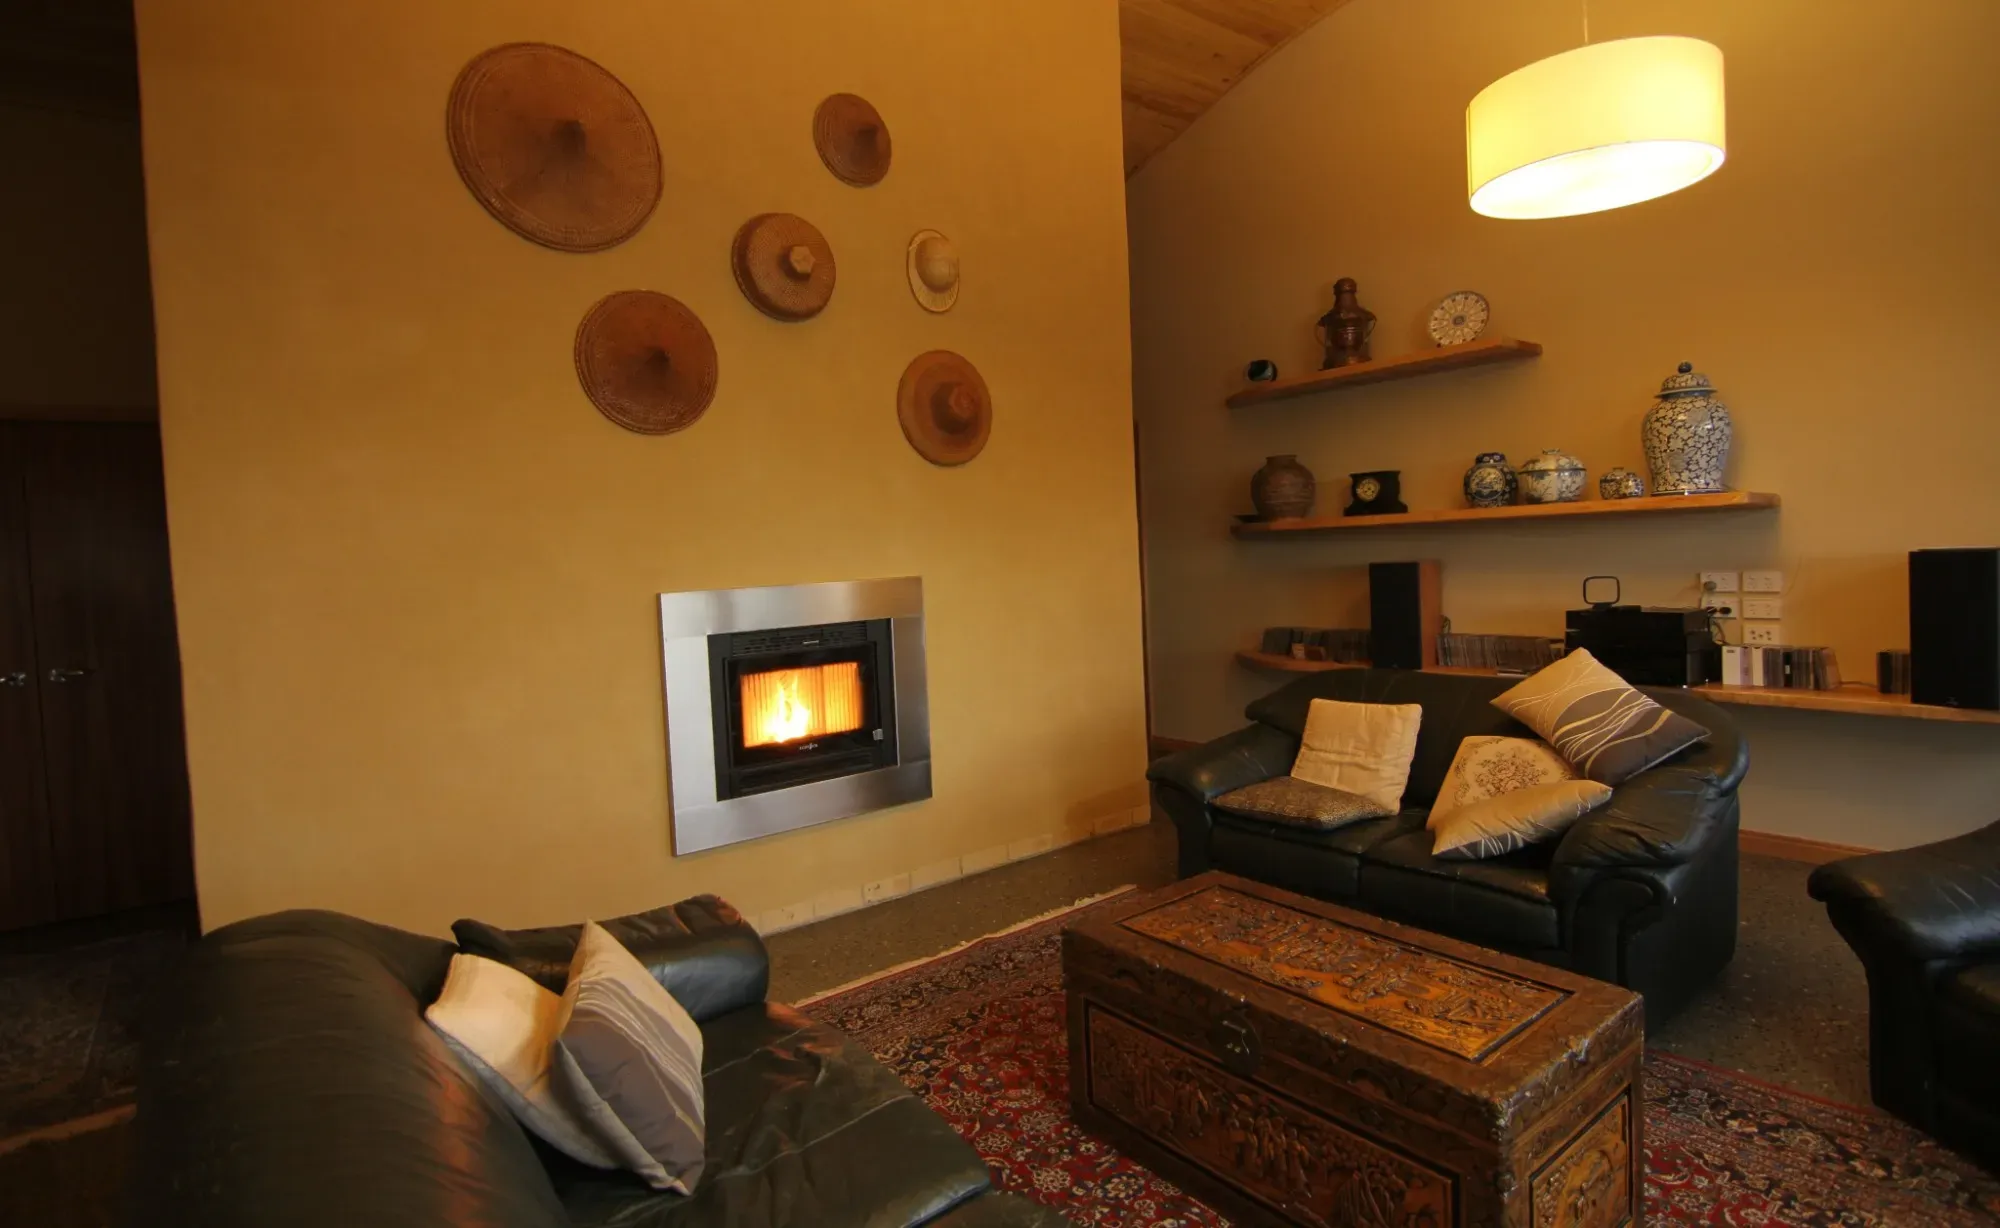
Earthen floors are special. They are softer than concrete floors, and have a wonderful tactile quality that is hard to match with other materials. Earthen floors are not just a flooring choice; they're a beautiful lifestyle statement. They embody a connection to the earth and a commitment to health and sustainability. With the right preparation and care, they can also be incredibly durable.
A Step Beyond Conventional Flooring
Earthen floors are not the norm in today's world of synthetic carpets and laminates, but they offer a unique blend of function and aesthetics. They're made from natural materials that are often sourced right from your local environment, which means they carry a piece of the local landscape into your home.
Why Consider Earthen Floors?
The Sustainability Aspect
Most importantly, earthen floors are kind to the planet. They're made from natural materials that don't require extensive processing or energy to produce. This means a lower carbon footprint and a sustainable choice for those looking to reduce their environmental impact.
Health and Comfort Benefits
Earthen floors contribute to a healthy living environment. They regulate humidity and are hypoallergenic, making them a great option for those with allergies or sensitivities. Because they're made from 100% natural materials, they are free from the toxic compounds often found in conventional flooring. They're also incredibly comfortable underfoot, providing a softness that hard surfaces like concrete can't match.
Cost-Effectiveness
When it comes to cost, earthen floors are remarkably economical. The materials are often inexpensive or even free if you source them yourself. The process of installing an earthen floor can be labor-intensive, but for the DIY enthusiast, this means the primary investment is your time and effort – a worthwhile trade-off for a floor that's both beautiful and affordable.
In our online program Earth Building Academy we teach two different techniques: Poured Earth Floors and Adobe Tile Floors. Read on for a how-to tutorial if you want to try this yourself.
Materials and Tools required to build an Earthen Floor
Before we get our hands dirty, let's talk about what you'll need to create your earthen floor. The beauty of this project is in its simplicity. The materials are straightforward, and the tools are likely already in your shed or can be easily acquired.
Identifying Your Local Earthen Resources
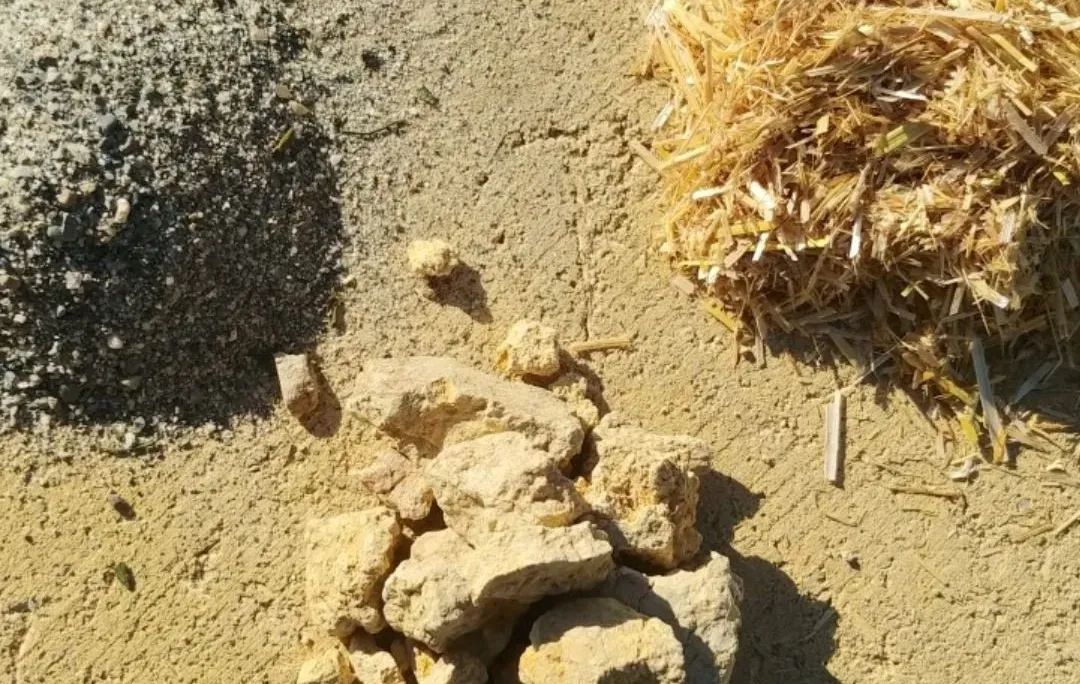
Your first step is to source your materials. You'll want to find a balance of clay and sand that works for your specific mix. The general rule of thumb is to aim for a mix that's about 20% clay and 80% sharp sand. But don't worry, we'll get into the specifics of testing your mix later on.
Tools for Mixing and Application
As for tools, you'll need the basics for mixing and placing: A shovel, buckets or a wheelbarrow, trowels and a straightedge. A large mixer, like a cement mixer, can be a huge time-saver if you're mixing large quantities, but you can also mix by stomping by foot.
Finishes for Durability and Aesthetics
Finally, consider how you'll finish your floor. Linseed oil and beeswax are popular natural options for sealing and protecting the surface, giving it a warm glow and making it more resilient to wear and tear.
Building Your Own Earthen Floor
To get started, you'll need a stable, strong, and level base to ensure the longevity of your floor. If you are building up your earthen floor from the ground, consider additional insulation under a base of gravel and hardfill.
Preparing Your Subfloor
Before you mix your first batch of earthen floor mix, the subfloor demands attention. It must be firm, free of movement, and capable of supporting the weight of your earthen floor. Use a mix of gravel and sand for the base layer to facilitate drainage and prevent moisture from wicking up. Compact this layer well, as it will serve as the foundation for everything that follows.
You can also lay an earthen floor over a concrete pad, or even a stable timber floor, if you are going over an existing surface.
Mixing the Right Blend: Clay, Sand, and Fiber
Getting the right mix is crucial for a floor that's both durable and crack-resistant. You'll want to start with a small test batch to find the perfect balance. For a standard mix, aim for about 20% clay to 80% sand, adjusting as necessary based on your local materials. Add natural fibers like chopped straw to the mix; this provides tensile strength and helps to control shrinkage and cracking.
For more information on sourcing materials and developing high performing mixes, check out our blog entry here, or watch our online class.
Laying Down Your Floor
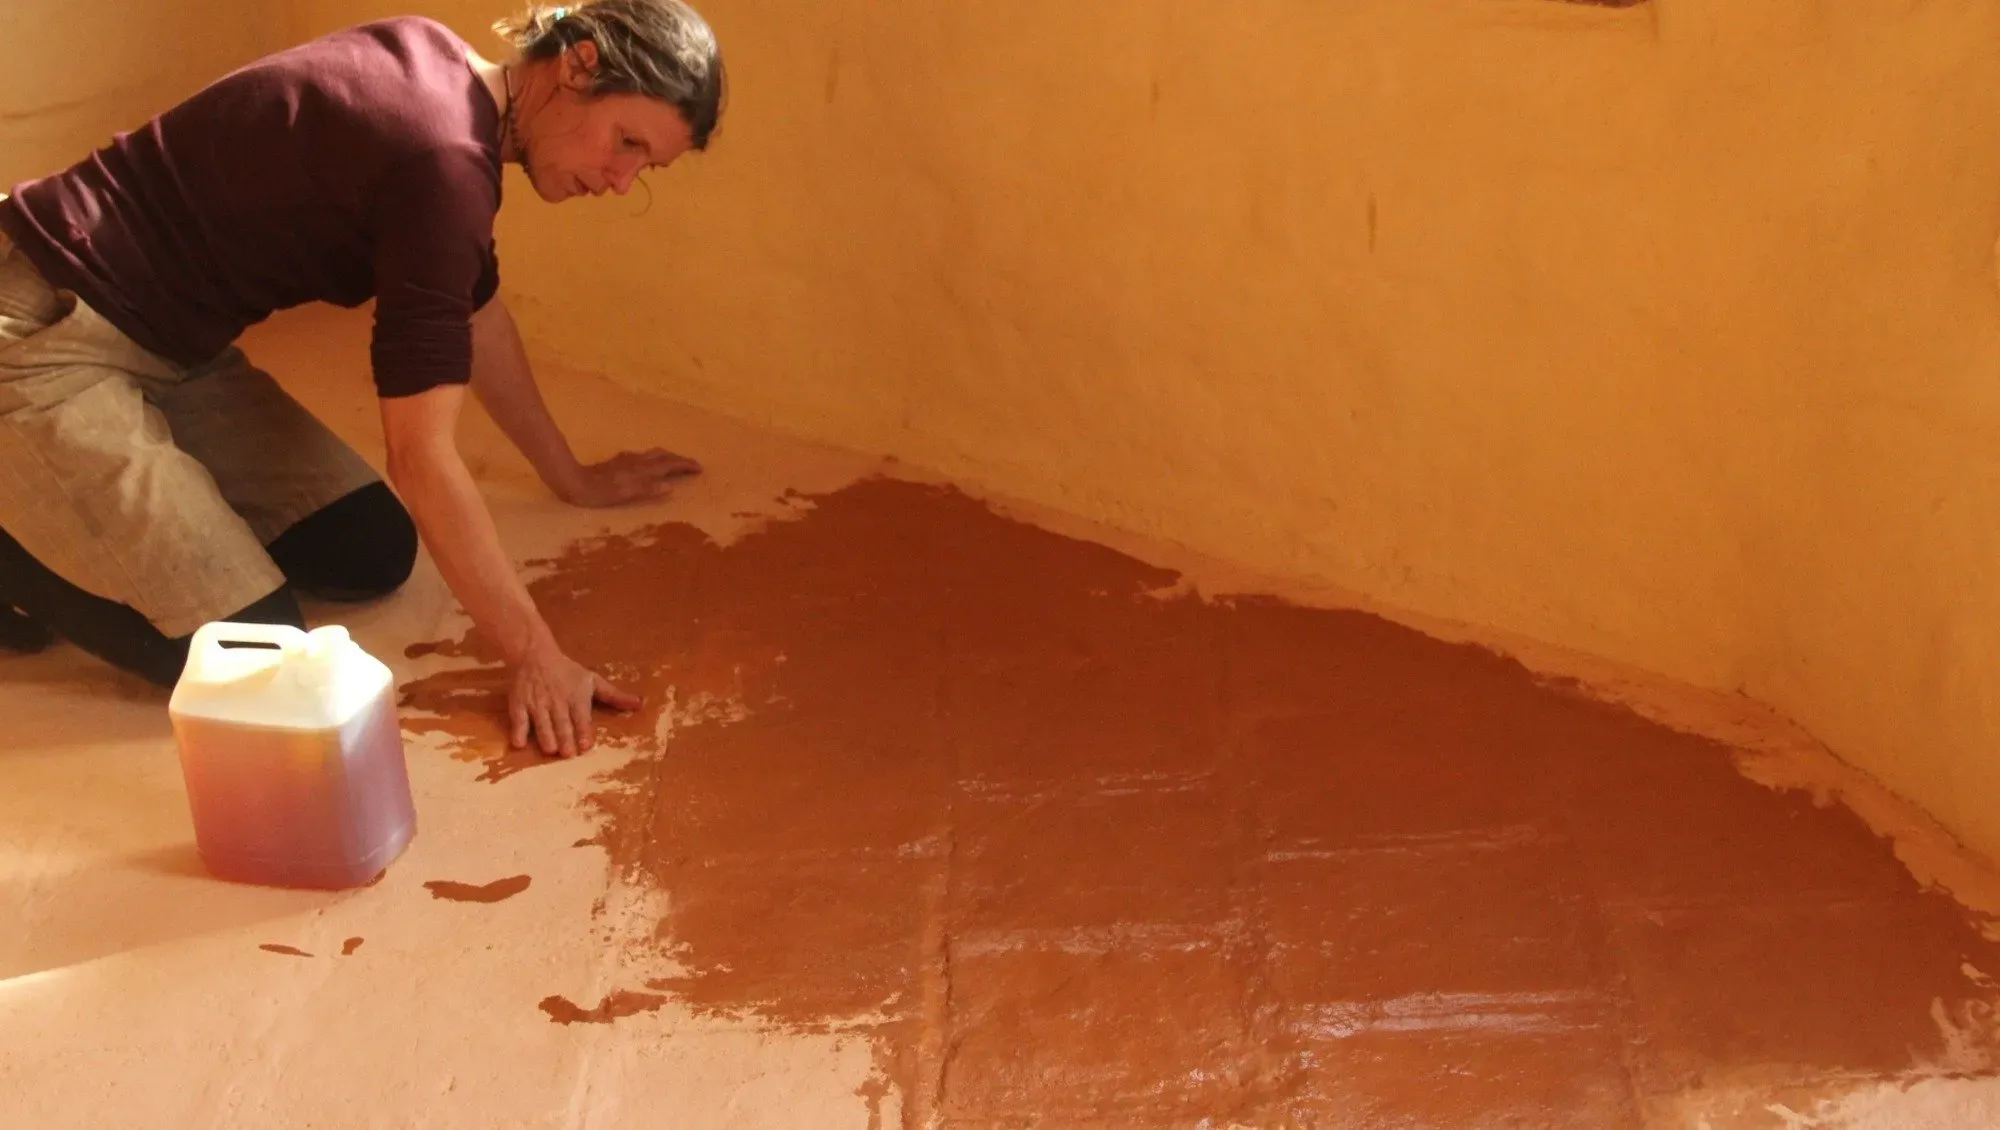
When it's time to lay down your floor, work in manageable sections. Pour the mix and use a trowel to spread it evenly. The thickness can vary, depending on substrate and buildup. Once spread, the surface should be smoothed and compressed. A technique known as 'tamping' is often used to compact the floor, which involves rhythmically pressing down on the surface with a tamper.
As the floor dries, it will begin to show its true character. This is a natural process, so don't be alarmed if you see small cracks appearing. These can be filled in with more of the earthen mix as needed, or finished with a thinner top coat.
It is common to work in a couple of layers. The first layer is thicker and can be up to 130mm thick, if you have the space and the substrate can take the weight. A thicker earthen floor will provide you with more thermal mass, but it is obviously also a lot more work. You can go as thin as 20mm with the right mix, but in our practice we find 40-50mm installed in 2 coats to be a sweet spot.
Sealing in the Goodness
Once your floor is fully dry, sealing is essential. This will protect it from moisture, stains, and wear. Natural drying oils, such as linseed oil and tung oil, are often used for their penetrating and protective qualities. Apply multiple coats, allowing the oil to penetrate deeply. Apply the next coat as soon as the previous one has fully soaked in. You want to saturate the floor with oil, but not have any oil pooling on the surface. Wipe up any excess and let the oiled floor dry and harden. Finish with a layer of beeswax or a commercial floor wax for added luster and durability.
Maintenance and Upkeep of Earthen Floors
Like any floor, an earthen floor requires care to maintain its beauty and function. Regular sweeping and damp mopping with a natural soap will keep it looking its best. Avoid harsh chemicals and excessive water, which can damage the sealant and the floor itself.
Cleaning Practices
For cleaning, use a soft broom or a vacuum with a brush attachment to remove dirt and debris. When mopping, a microfiber mop and a mild, pH-neutral cleaner are your best friends. Spills should be wiped up promptly to prevent staining.
Rejuvenating Your Floor
Over time, your floor may begin to show signs of wear. This is natural and can be addressed with a fresh coat of oil or wax. If you notice an area becoming dull or rough, simply clean the surface and apply a new coat of finish. This not only refreshes the look of your floor but also renews its protective layer.
Design Tips for Earthen Floors
Incorporating Mosaics and Insets
Consider adding mosaics or insets to your floor for a custom touch. You can embed stones, tiles, or even glass pieces into the wet mix to create patterns or focal points.
Coloring and Pigmentation: A World of Possibilities
Coloring your earthen floor is another way to enhance its beauty. Natural pigments can be mixed into the plaster before application to achieve a range of earthy tones. Or you can finish the dry earthen floor with a casein or clay paint before sealing with oil. Experiment with test batches to find the perfect hue for your space. Remember, the final color will be a few shades darker once the floor is oiled.
Case Studies: Earthen Floors Across the Globe
Earthen floors have graced homes across the world for centuries, each region adding its own unique touch to the basic concept. From the adobe houses of the American Southwest to the tamped earth floors of Africa, these surfaces tell a story of human ingenuity and a deep connection to the land.
Traditional and Modern Instances
In New Mexico, for example, traditional Pueblo homes have earthen floors that have stood the test of time, often passed down through generations. These floors are known for their deep, rich colors and smooth, polished finish. On the other side of the world, in Africa, earthen floors are often seen in the form of 'cow dung floors,' which use a mixture of dung and mud to create a hard, durable surface.
For earth floor inspiration we recommend you check out the work of Sukita Crimmel. She has written a very comprehensive book on the subject called - you guessed it - “Earthen Floors”.
Lessons from Long-Standing Use
What these varied applications teach us is that earthen floors are adaptable and resilient. They work in harmony with their environment, whether it's the dry, arid climate of the desert or the more temperate regions of Europe.
FAQs About Earthen Floors
Can Earthen Floors Be Installed Over Existing Subfloors?
Yes, earthen floors can be installed over existing subfloors, but the subfloor must be solid and stable. It's important to ensure that there's no movement, as this can cause cracking in the earthen floor. Additionally, a moisture barrier may be necessary to prevent water from seeping up into the earthen layer and getting trapped below the oiled surface.
How Do Earthen Floors Impact Indoor Air Quality?
Earthen floors can positively impact indoor air quality. They are made from natural materials that don't off-gas harmful chemicals, unlike some synthetic flooring options.
Are Earthen Floors Suitable for All Climates?
While earthen floors are versatile, they are best suited to climates that are not excessively wet. In very humid or flood-prone areas, special considerations must be taken to protect the floor from moisture damage. However, with the right design, such as adequate drainage, a good floor build-up and a vapour barrier, earthen floors can be adapted to a wide range of climates.
How Do You Repair Cracks or Damage in an Earthen Floor?
Cracks or damage in an earthen floor can be repaired by filling them with a fresh mix of the same material used to create the floor. It's important to remove any loose material and dampen the area before applying the new mix. Once filled, the repair should be tamped down and allowed to dry slowly, then sealed to match the rest of the floor.
Whether you're building new or renovating, consider the timeless appeal of an earthen floor—it may just be the grounding element your space has been missing.
In this blog post we covered the basics of poured earth floors, but there are other techniques that can be used too, such as Adobe tiles. In our 3-month online natural building program, we cover both techniques in depth.