Transform Your Walls with Earthen Plaster
Transform Your Walls with Earthen Plaster
Dec 27, 2023
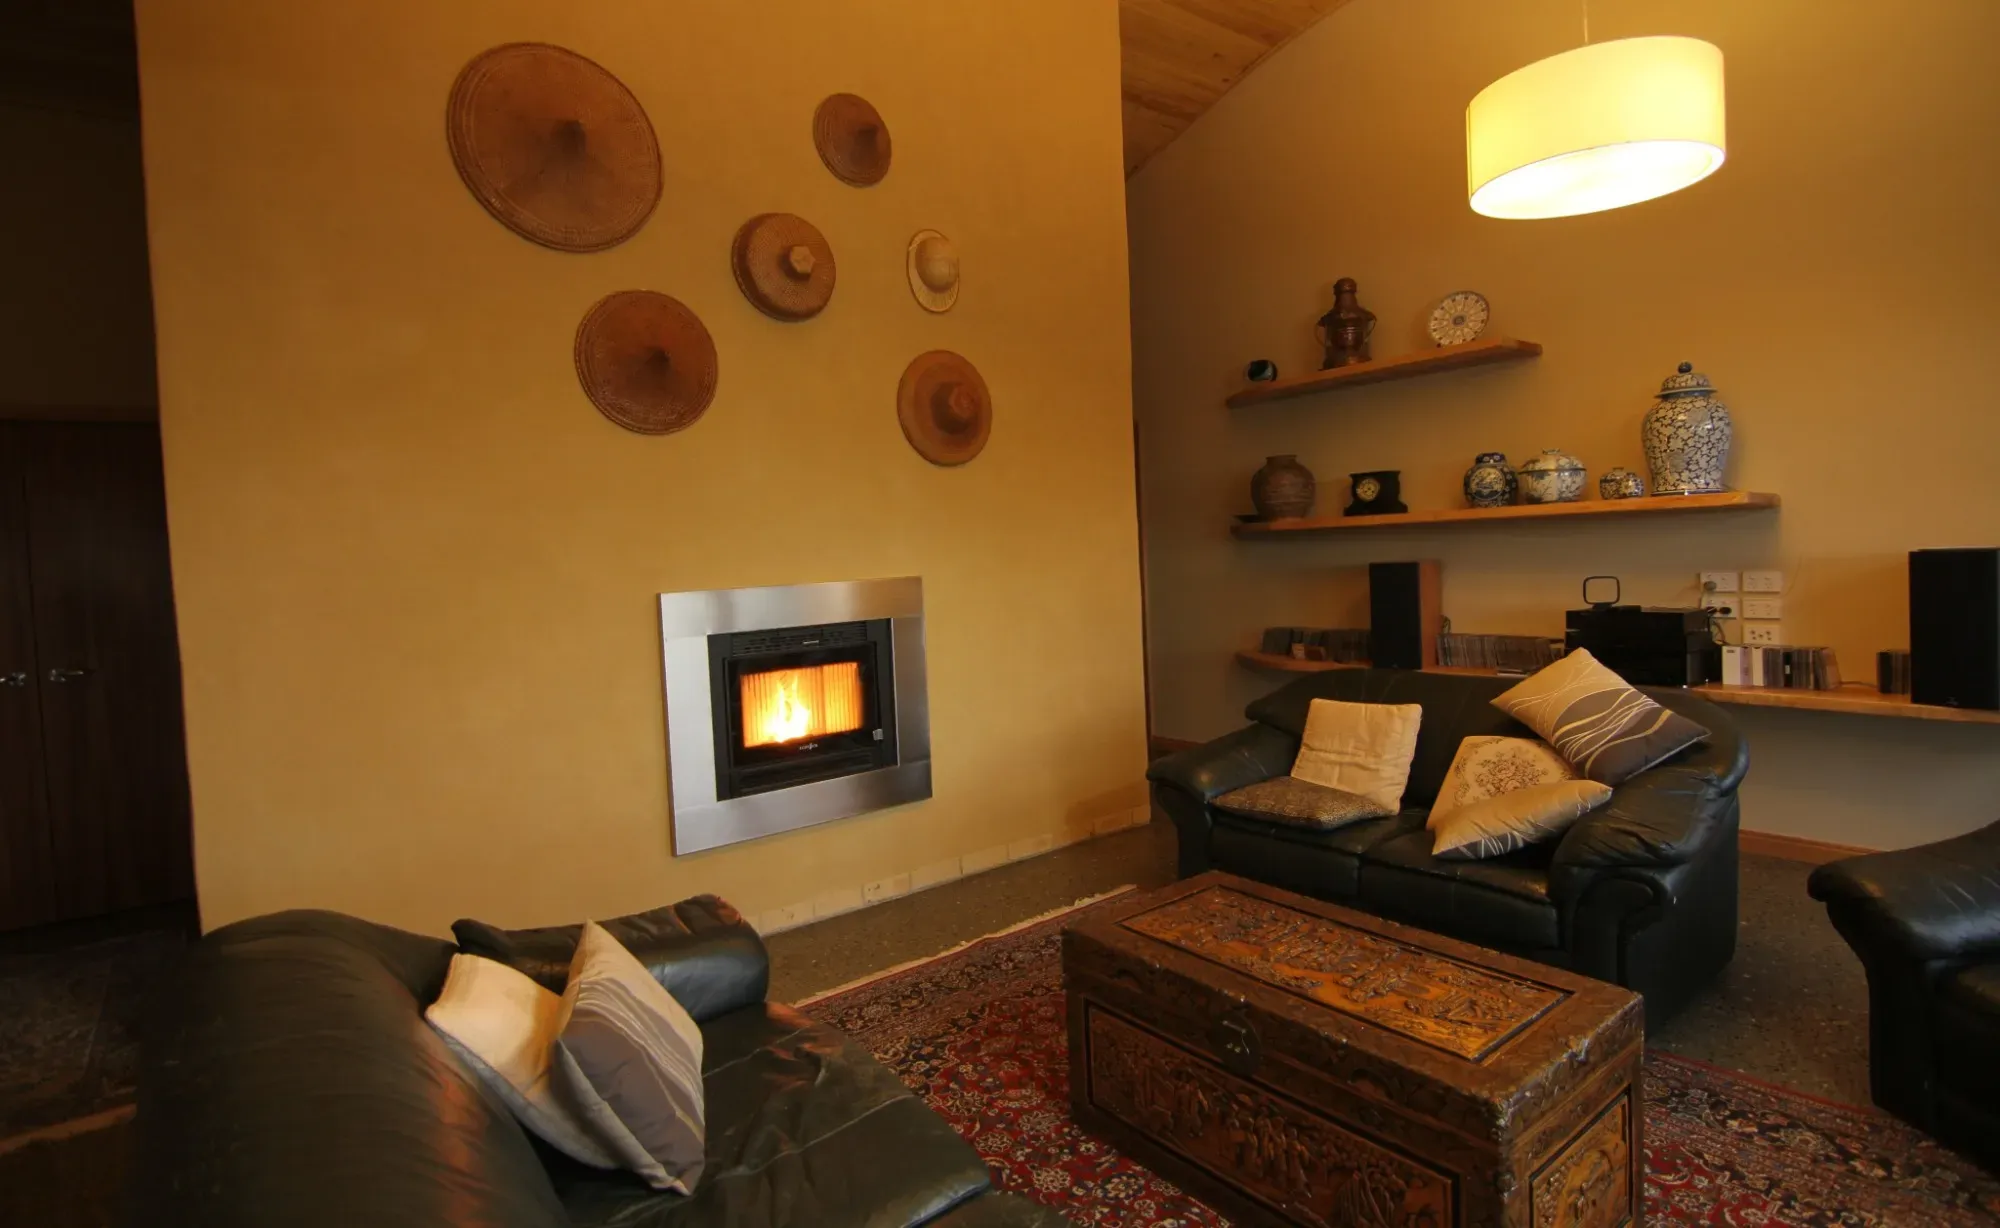
Earthen plaster offers an opportunity to transform any room into something truly special, bringing the beauty of your local soils into your home. They create surfaces that not only are visually stunning but also environmentally friendly and healthy for your living space. It's a tactile and versatile material that brings a sense of warmth and texture that's simply unmatched.
What Is Earthen Plaster and Why Choose It?
Earthen plaster is a blend of natural materials – primarily clay, sand, and straw or other fibers. It's a time-tested technique that has been used for centuries to coat and protect walls, and which is seeing revival and exciting innovation in the past three decades. Here's why it's a choice worth considering:
- It's eco-friendly: Made from abundant, natural materials, it has a minimal environmental footprint.
- It regulates humidity: Clay naturally absorbs and releases moisture, helping to maintain comfortable indoor air quality.
- It's non-toxic: Free from chemicals and synthetic substances, it's safe for you and your family.
- It has thermal mass properties: Earthen plaster can help stabilize room temperatures, saving energy and costs.
- It's acoustically beneficial: The texture and composition can help dampen sound, creating a quieter environment.
- It offers endless aesthetics: With a variety of finishes and the ability to add pigments and effects, it's customizable to your taste.
Supplies You'll Need for Installation
Before diving in, let's ensure you're equipped for the task. Here's what you'll need to get started:
- Earthen plaster mix: You can buy pre-mixed or gather clay, sand, and fibers to mix your own.
- Water: For mixing the plaster to the right consistency.
- Buckets and mixing tools: A large bucket for mixing and a drill with a mixing paddle make the job easier.
- Trowels: A variety of good quality tools will help with application.
- Hawk: To hold the plaster as you apply it to the wall.
- Sponges and brushes: For finishing touches and cleaning up edges.
- Primer: A rough key coat helps the plaster adhere to the plasterboard and protects the plasterboard from moisture.
- Drop cloths and masking tape: To protect your floors and create clean edges.
With these supplies at hand, you're ready to embark on a journey that will feel satisfying and leave your walls with a finish that's both beautiful and functional.
Pre-Plastering Preparations
Preparation is key. A well-prepared wall ensures that your earthen plaster adheres properly and lasts for years. Let's walk through the steps to set the stage for a successful plastering job.
Stopping and Priming the Plasterboard
When working with plasterboard, it is important to make sure it is screwed to the supporting frame well, and that the joints are taped and stopped as you would do for other wall finishes. You can do this yourself, as stopping doesn’t have to be a perfect job. You also don’t have to sand the stopped joints. Before applying the key coat, the plasterboard should be clean and dust free.
Earthen plaster only binds to a substrate mechanically, so it is important to provide an adequate key to a smooth surface like a plasterboard. Gypsum board ideally is primed to seal the cardboard surface and protect it from the moisture of the earthen plaster. We like to combine the steps of priming and key coat application.
- Tape and stop the sheet joints with gypsum compound and either paper tape or mesh tape.
- Wipe down walls with a damp cloth to remove dust and debris.
- Cover floors and adjacent areas with drop cloths to protect from splatters.
Applying a Key Coat for a Strong Bond
Now it's time to apply a key coat. Think of this as roughening the surface so that your earthen plaster has something to hold on to. You can create this by either using interior grade PVA glue thinned with a little water or suitable interior acrylic paint mixed with sand and rolled onto the walls. It should be rough to the touch when it dries – a perfect base for your plaster.
- Roll on the key coat using a paint roller. Put the glue or acrylic paint into the paint tray and have a box of sand ready. Roll on one pass of glue, and then roll the roller in the sand and over the fresh glue to create a surface that is like sandpaper.
- Allow the key coat to dry fully. It should be rough and strong enough to be rubbed without sand coming off.
- Check the entire wall for uniform roughness; reapply in any smooth spots.
With your walls prepped and ready, you're all set to mix and apply the earthen plaster. The transformation is about to begin!
Mixing Your Earthen Plaster
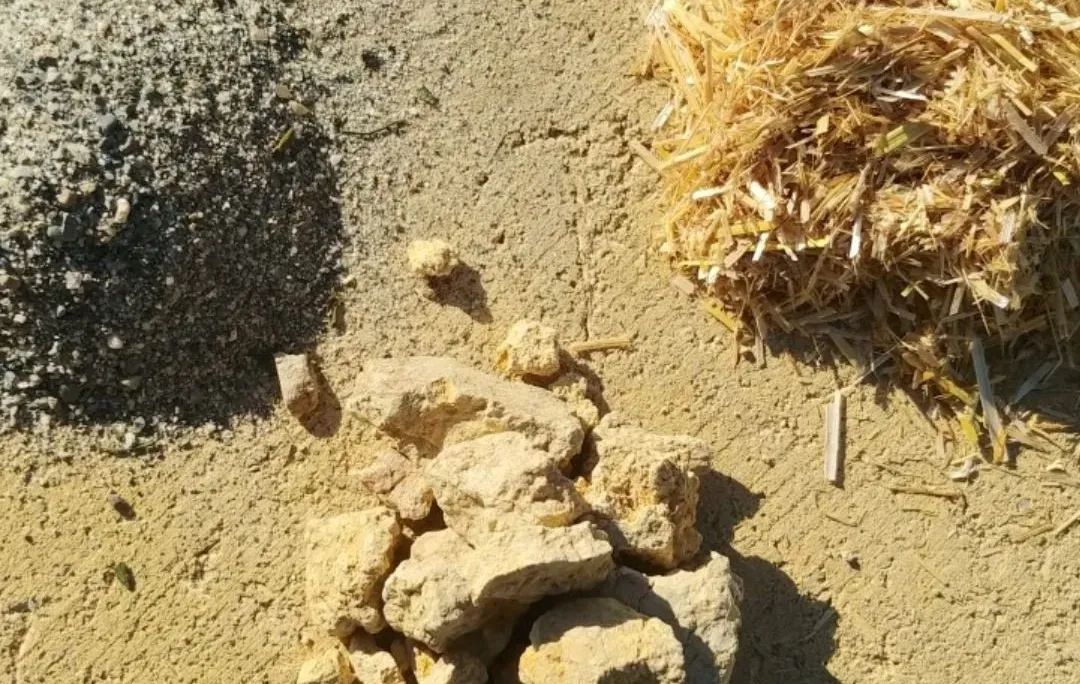
Mixing your earthen plaster from local materials is like making a cake from scratch – the better the ingredients and the mixing, the better the end result. Start by soaking and mixing your clay-rich soil and then sieving it through a 3-5mm sieve. This will give you a smooth clay binder that you then can thoroughly mix with your dry components – sand and finely chopped fibers. You want to use well graded sharp sand, or even a blend of fine sands.
Adjust the water content until you get a consistency that's workable but not too wet. It should hold its shape on a trowel without dripping off. Take your time to get this right; the quality of your mix determines the quality of your finish.
Finding the Right Balance: Clay, Sand and Fibers
Getting the mix just right is a balancing act. Too much clay, and your plaster will crack. Too much sand, and it won't stick properly and be dusty. Aim for a mix that's about one part clay to three parts sand, with a handful of fibers thrown in for strength. The fibers – straw, hemp, or cellulose – help hold the plaster together and prevent cracking as it dries.
- Start with a 1:3 ratio of clay to sand for stability and adhesion.
- Do test patches to determine your exact ratios.
- Sieve the clay binder wet to activate it’s maximum stickiness.
- Add good quality sand that is suitable for plastering, or a blend of sands.
- Add fibers for tensile strength, which will help in preventing cracks.
- Adjust the water slowly, aiming for a mix that is malleable but not runny.
Further Reading: How to Develop Well Performing Mixes
Secret Ingredients for Enhanced Durability
For a plaster that stands the test of time, consider adding a natural stabilizer like wheat paste or casein. These ingredients act like a natural glue, increasing the plaster's durability and resistance to wear. Or consider a natural mineral pigment if you want to add a splash of color to your walls. These pigments blend seamlessly with earthen plaster, giving you a range of color options that are as subtle or as vibrant as you like.
- Wheat paste or casein can be added for extra durability.
- Natural mineral pigments offer a customizable color palette.
- Mix stabilizers and pigments thoroughly to avoid clumping and ensure even distribution.
Applying the Plaster
With your plaster mixed and ready, it's time to apply it to the walls. Scoop some plaster onto your hawk, and then, using a trowel, apply it to the wall in smooth, upward strokes. Aim for a layer that's about 6-8mm thick. Don't worry about getting it perfect on the first pass – you'll be working in two layers. The key here is to cover the key coat completely, creating a strong base for subsequent layers.
- Use smooth, consistent strokes to apply the plaster evenly across the wall.
- Maintain a thickness of about 6-8mm to ensure even drying and avoid cracking.
- Overlap each stroke slightly to avoid gaps and ensure full coverage.
- Don’t overwork the plaster by passing over it many times. The surface doesn’t have to be perfect, it’s only a base coat.
Applying earthen plaster is as much an art as it is a technique. With practice, patience and attention to detail, you will get the hang of it. We recommend you start on the least visible surface you are plastering, in a place where there is little light shining from the side (which exposes unevenness and flaws without mercy).
The Art of the Base Coat: Getting It Right
The first coat, or the base coat, is crucial but doesn’t have to have a perfect surface. It's the foundation that sets the stage for the next layer: The finish coat. You're aiming for a coat that's thick enough to cover but not so thick that it will sag or take too long to dry. 6-8mm work well, but this thickness will also depend on your plaster. Work in small sections, moving across the wall methodically. And remember, perfection is not the goal here; coverage and consistency are.
- Ensure the coat is even and covers the entire surface.
- Keep the layer uniform in thickness to avoid drying issues.
Subsequent Layer: Building Up the Finish
Once the base coat is dry, it's time to add the finish coat. This is where you can get creative with texture and color. It's thinner than the other layer and requires a delicate touch with a more flexible trowel. This coat gets compacted with a sponge and another pass of the trowel when it is ready to be worked without damaging the plaster (this stage is called “leather hard”).
- Allow the base coat to dry completely before applying the finish coat.
- Use the finish coat to achieve the desired texture and color.
Drying and Curing Your Earthen Plaster
Earthen plaster dries best in warm, well-ventilated spaces. Typically the total plaster thickness applied to a plasterboard is 10-15mm, and will dry in a few days without the need for a fan or forced drying.
Patience Pays Off: Waiting for the Plaster to Dry
As you wait for the plaster to dry, check the surface regularly. It will lighten in color as it dries, which is a good indicator of progress. Touch it gently; if it's cool to the touch, it's still releasing moisture. Give it time. Rushing to the next step before the plaster is fully dry can compromise the quality of your work.
- Monitor the color change as an indicator of drying.
- Touch the plaster to gauge moisture content.
- Wait until the plaster is room temperature and uniformly lightened before proceeding.
- You can touch up imperfections while the plaster is still damp, ideally in the leather hard stage by adding a little more plaster and gently sponging it in.
Keep it breathable: Applying an optional Natural Sealer
Once the plaster is dry, you can opt to apply an additional sealer which makes the surface a bit harder and more wipeable. The important thing to remember here is to use a breathable surface finish that is compatible with earthen plaster
- Clear Casein Sealer
- Clay Paint or Limewash
- Silicate Paint
If you are interested in our collection of breathable wall finishes, you can access them here.
Maintenance and Care
Now that your walls have a fresh, natural look with earthen plaster, let's talk about keeping them in tip-top shape. Maintenance is straightforward, but it does require a gentle touch and the right approach to ensure your walls stay looking as good as new.
Keeping Your Earthen Plaster Looking Pristine
Earthen plaster has a robust surface, but it's not immune to the wear and tear of daily life. Dust and dirt can accumulate, so regular dusting with a soft cloth or brush is a good practice. For more stubborn spots, a damp sponge can be used. Just be gentle – scrubbing too hard can wear down the beautiful finish you've worked so hard to achieve. The colour of the walls should remain vibrant for years to come, since earthen pigments are lightfast.
- Gently dust your walls regularly to prevent buildup.
- Use a lightly damp sponge for cleaning – no harsh chemicals needed.
- Avoid abrasive materials that can scratch or damage the surface.
- Freshening up the wall is easy with another coat of clay paint.
Quick Fixes for Cracks and Dents
Life happens, and sometimes that means small cracks or dents in your plaster. But there's no need to worry – these can be easily fixed. For small cracks, simply moisten the area lightly with water and fill it with a matching plaster mix. For dents or larger areas, you may need to remove a bit of the plaster around the damage before filling it in for a seamless repair. Once it's firming up a bit, sponge it lightly to blend the seams, and your wall will be as good as new.
- Moisten the area around small cracks before filling them in for better adhesion.
- Use a matching plaster mix to ensure consistency in texture and color.
- For larger repairs, clear away loose plaster before applying the new mix.
Natural Building Tip: Keep some of your original Finish Coat Plaster for future repairs, for a perfect colour match. You can simply dry out little dollops of plaster and make “Repair Biscuits” which can easily be reactivated with a little water when repairs are needed.
FAQ: Earthen Plaster Installation
Can earthen plaster be used in bathrooms or kitchens?
Yes, earthen plaster can be a great addition to bathrooms and kitchens, but with a few considerations. These areas are prone to direct moisture, so they need to be kept well away from running water. In these rooms, it is extra important to ensure the earthen surfaces are kept breathable, so that the can do what they do best: regulate humidity.
- Ensure proper ventilation to manage moisture levels.
- Consider a breathable, natural sealant for extra serviceability.
- Keep earthen plaster away from splash zones.
How long does the drying process take for earthen plaster?
The drying time for earthen plaster can vary widely based on factors such as the thickness of the plaster layers, the humidity, and the temperature of the environment.
- Expect a drying time of at least 7 days, though it can take longer in some conditions.
- Avoid speeding up the process with direct heat or fans.
- Check the plaster's color and feel to gauge its dryness over time.
Is it necessary to apply a finish or sealant over the earthen plaster?
While earthen plaster has a natural beauty, applying a finish or sealant can provide additional protection and ease of maintenance. This is especially true in high-traffic areas or spaces exposed to moisture, like kitchens and bathrooms. A natural, breathable sealant can protect the plaster from stains while maintaining its ability to regulate humidity. It's not always necessary, but it's a good idea if you want to preserve the look and integrity of your plaster over time.
- Consider a sealant for areas that need extra protection from stains.
- Choose a breathable product to maintain the plaster's natural humidity regulation.
- Some finishes are chosen for aesthetic reasons.
Can earthen plaster be applied over painted plasterboard or wallpaper?
Applying earthen plaster over painted plasterboard is possible, but it requires some preparation. The paint surface needs to be roughened up to allow the plaster to adhere properly. This can be done by sanding the painted surface before applying the key coat. Once prepped, the earthen plaster can be applied as usual. Always ensure the painted surface is stable and not peeling before you begin.
- Sand the painted surface or use a gripping primer to prepare it for plastering.
- Ensure the existing paint is not flaking or peeling off.
- Test a small area first to check for good adhesion before covering the entire wall.
- Wallpaper is best stripped before earthen plastering.
How can I achieve different textures with earthen plaster?
One of the joys of working with earthen plaster is the variety of textures you can create. From smooth, polished finishes to rustic, rugged looks, the possibilities are endless. Use different trowels, brushes, or even your hands to apply and shape the plaster. Techniques such as sgraffito, where layers are scratched to reveal colors beneath, or adding mica flakes for sparkle, can add depth and interest to your walls. Experiment on small test areas to perfect your technique before tackling the whole wall.
In Conclusion:
- Earthen plaster is an eco-friendly, durable, and aesthetically pleasing option for wall finishes.
- Proper preparation of the plasterboard and the earthen plaster mix is essential for a successful application.
- Drying times can vary, and patience is key to ensure a fully cured and durable finish.
- While not always necessary, a breathable sealant can provide extra protection for your earthen plaster walls.
- With a little creativity and experimentation, you can achieve a wide range of textures and finishes to suit your style.
With the right approach and a bit of patience, you can create a finish that's not only stunning but also stands the test of time. So, roll up your sleeves and let the earth move you to create something truly special.